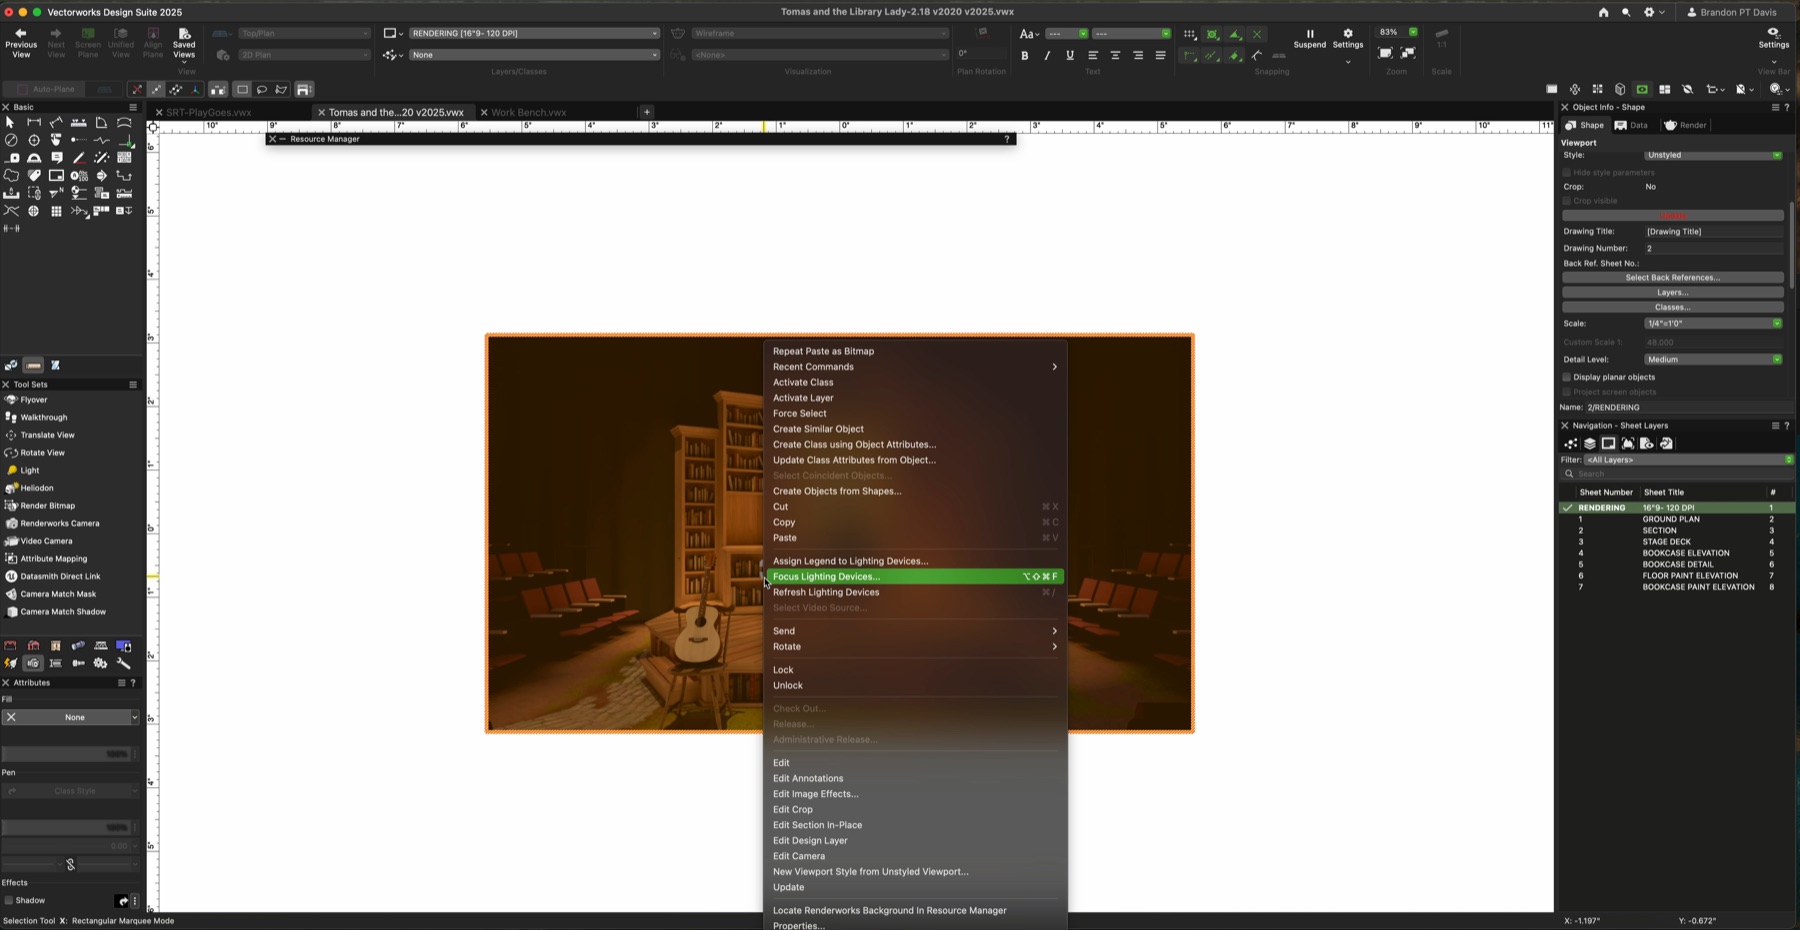
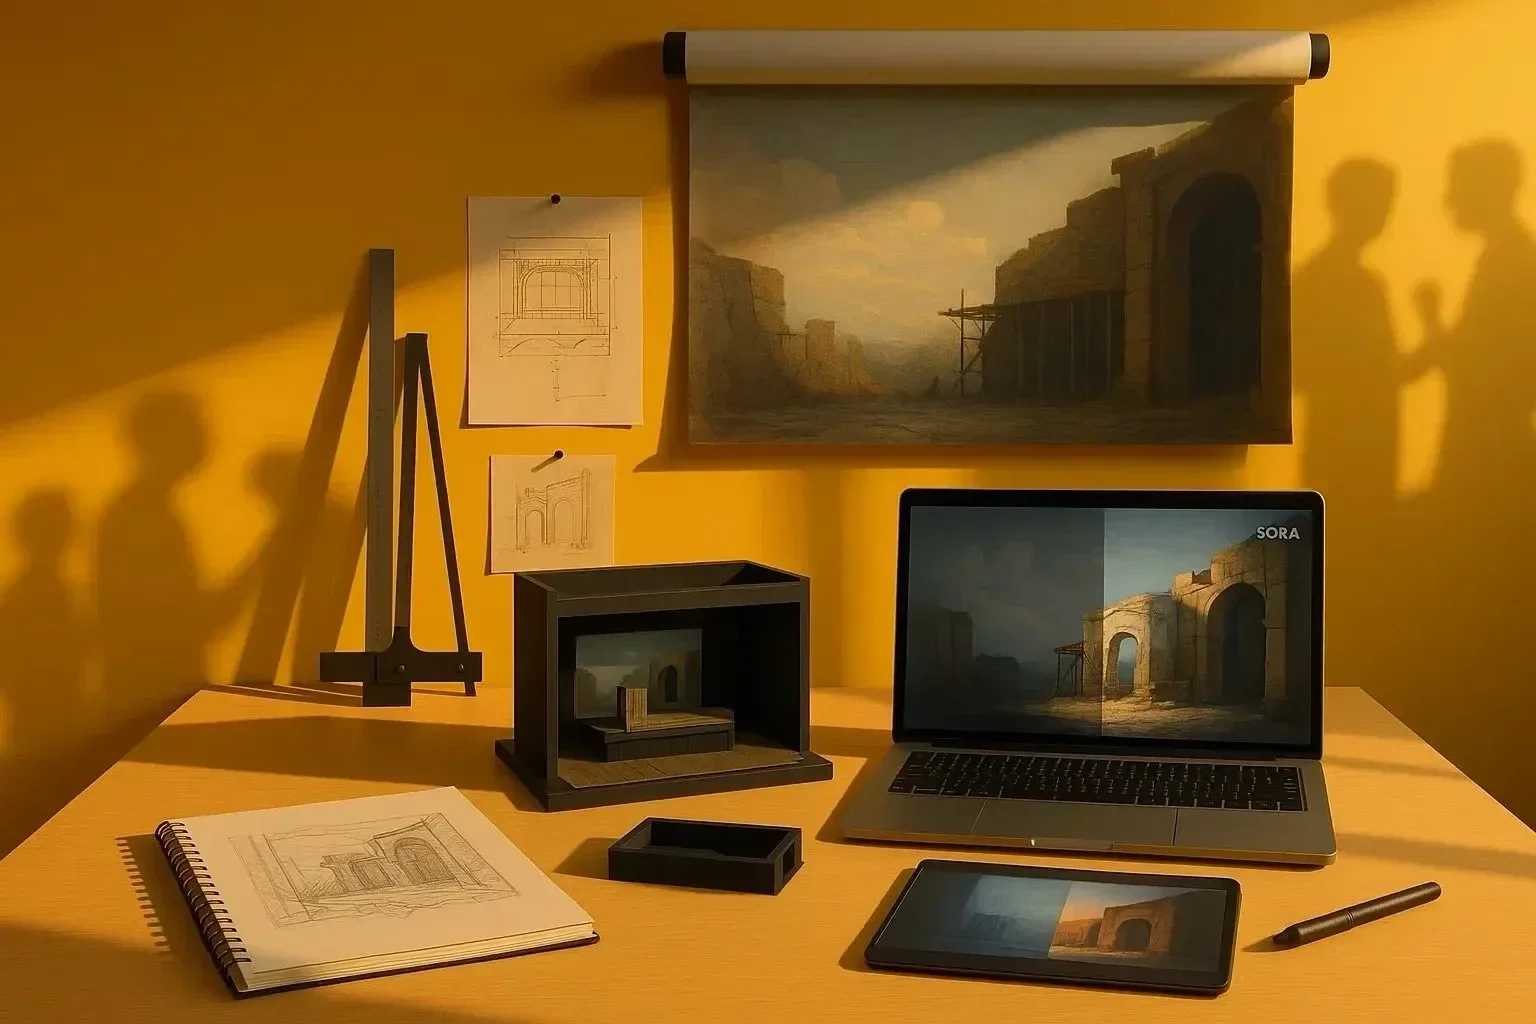
Lighting and render styles are easiest to judge when the model stays still. The same camera, same scenery, and same composition can reveal what each render choice actually changes: speed, contrast, material response, atmosphere, and focus.
The goal is not to make every render as heavy as possible. The goal is to choose the lightest setup that communicates the scenic idea clearly enough for the current stage of review.
One Model, Five Reads
Compare the render before committing to a style
Use the tabs to move through the same Carnegie Library model rendered five ways. Nothing changes except the render approach, which makes the differences easier to read.
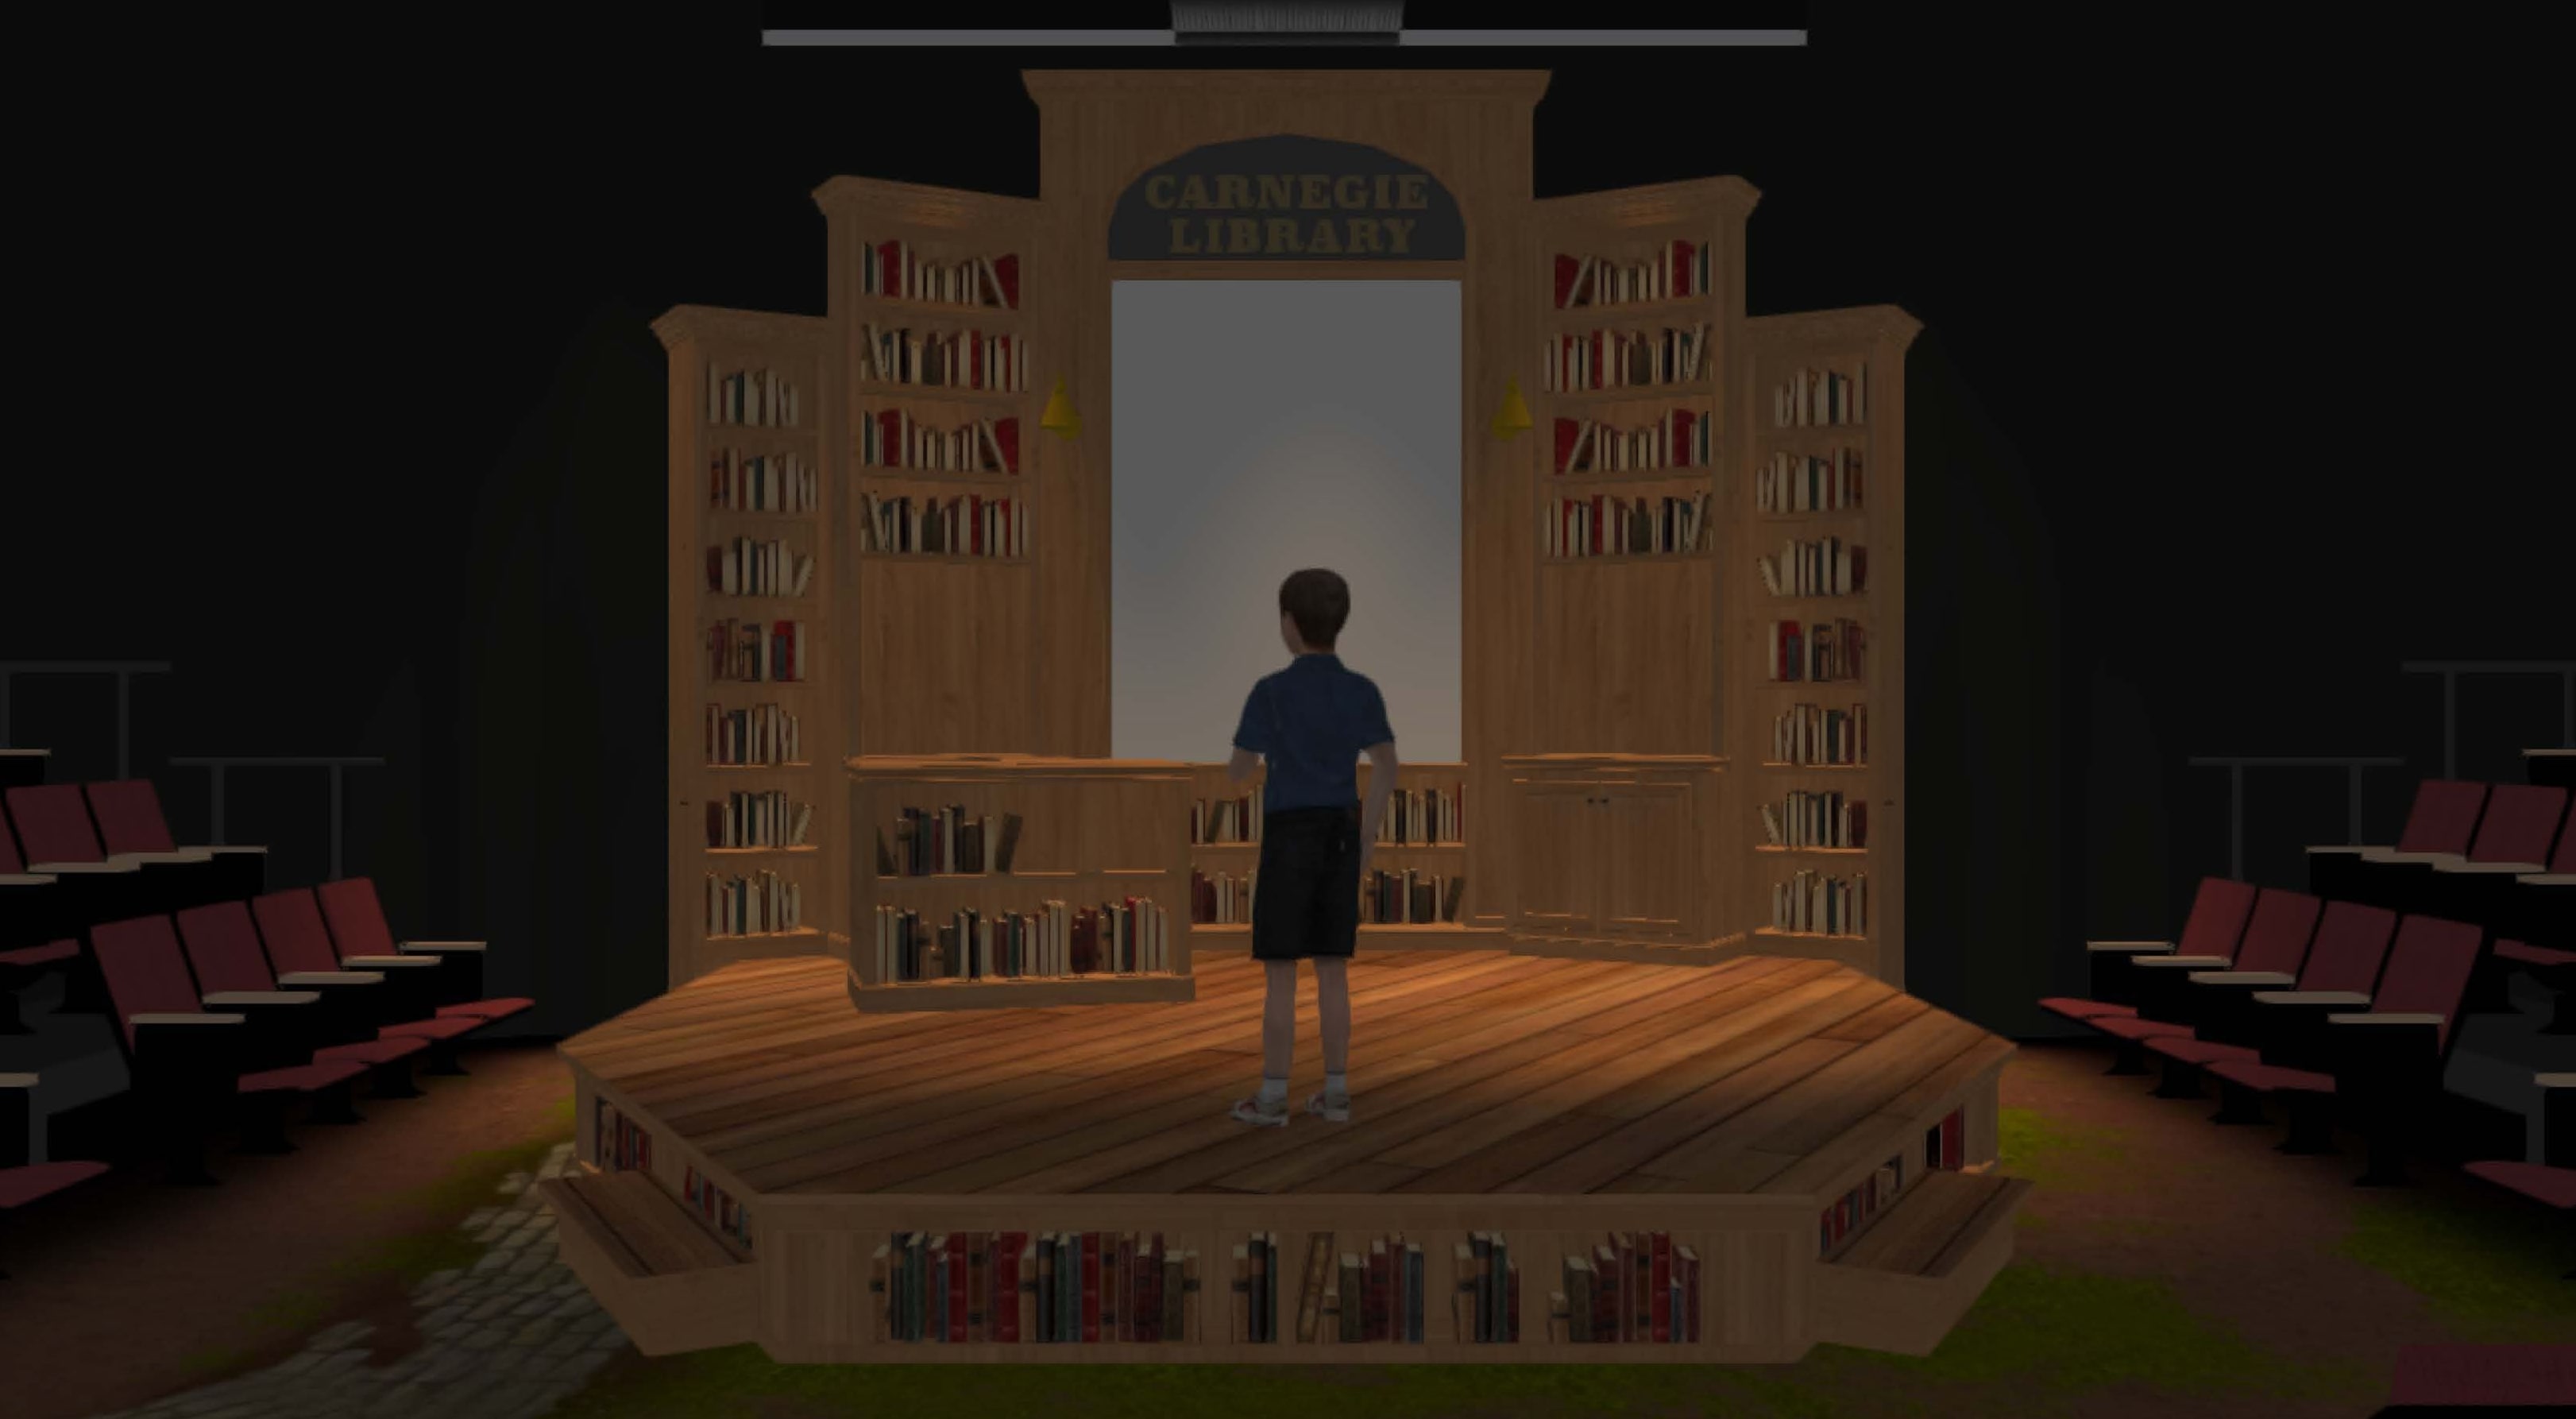
Fast Review
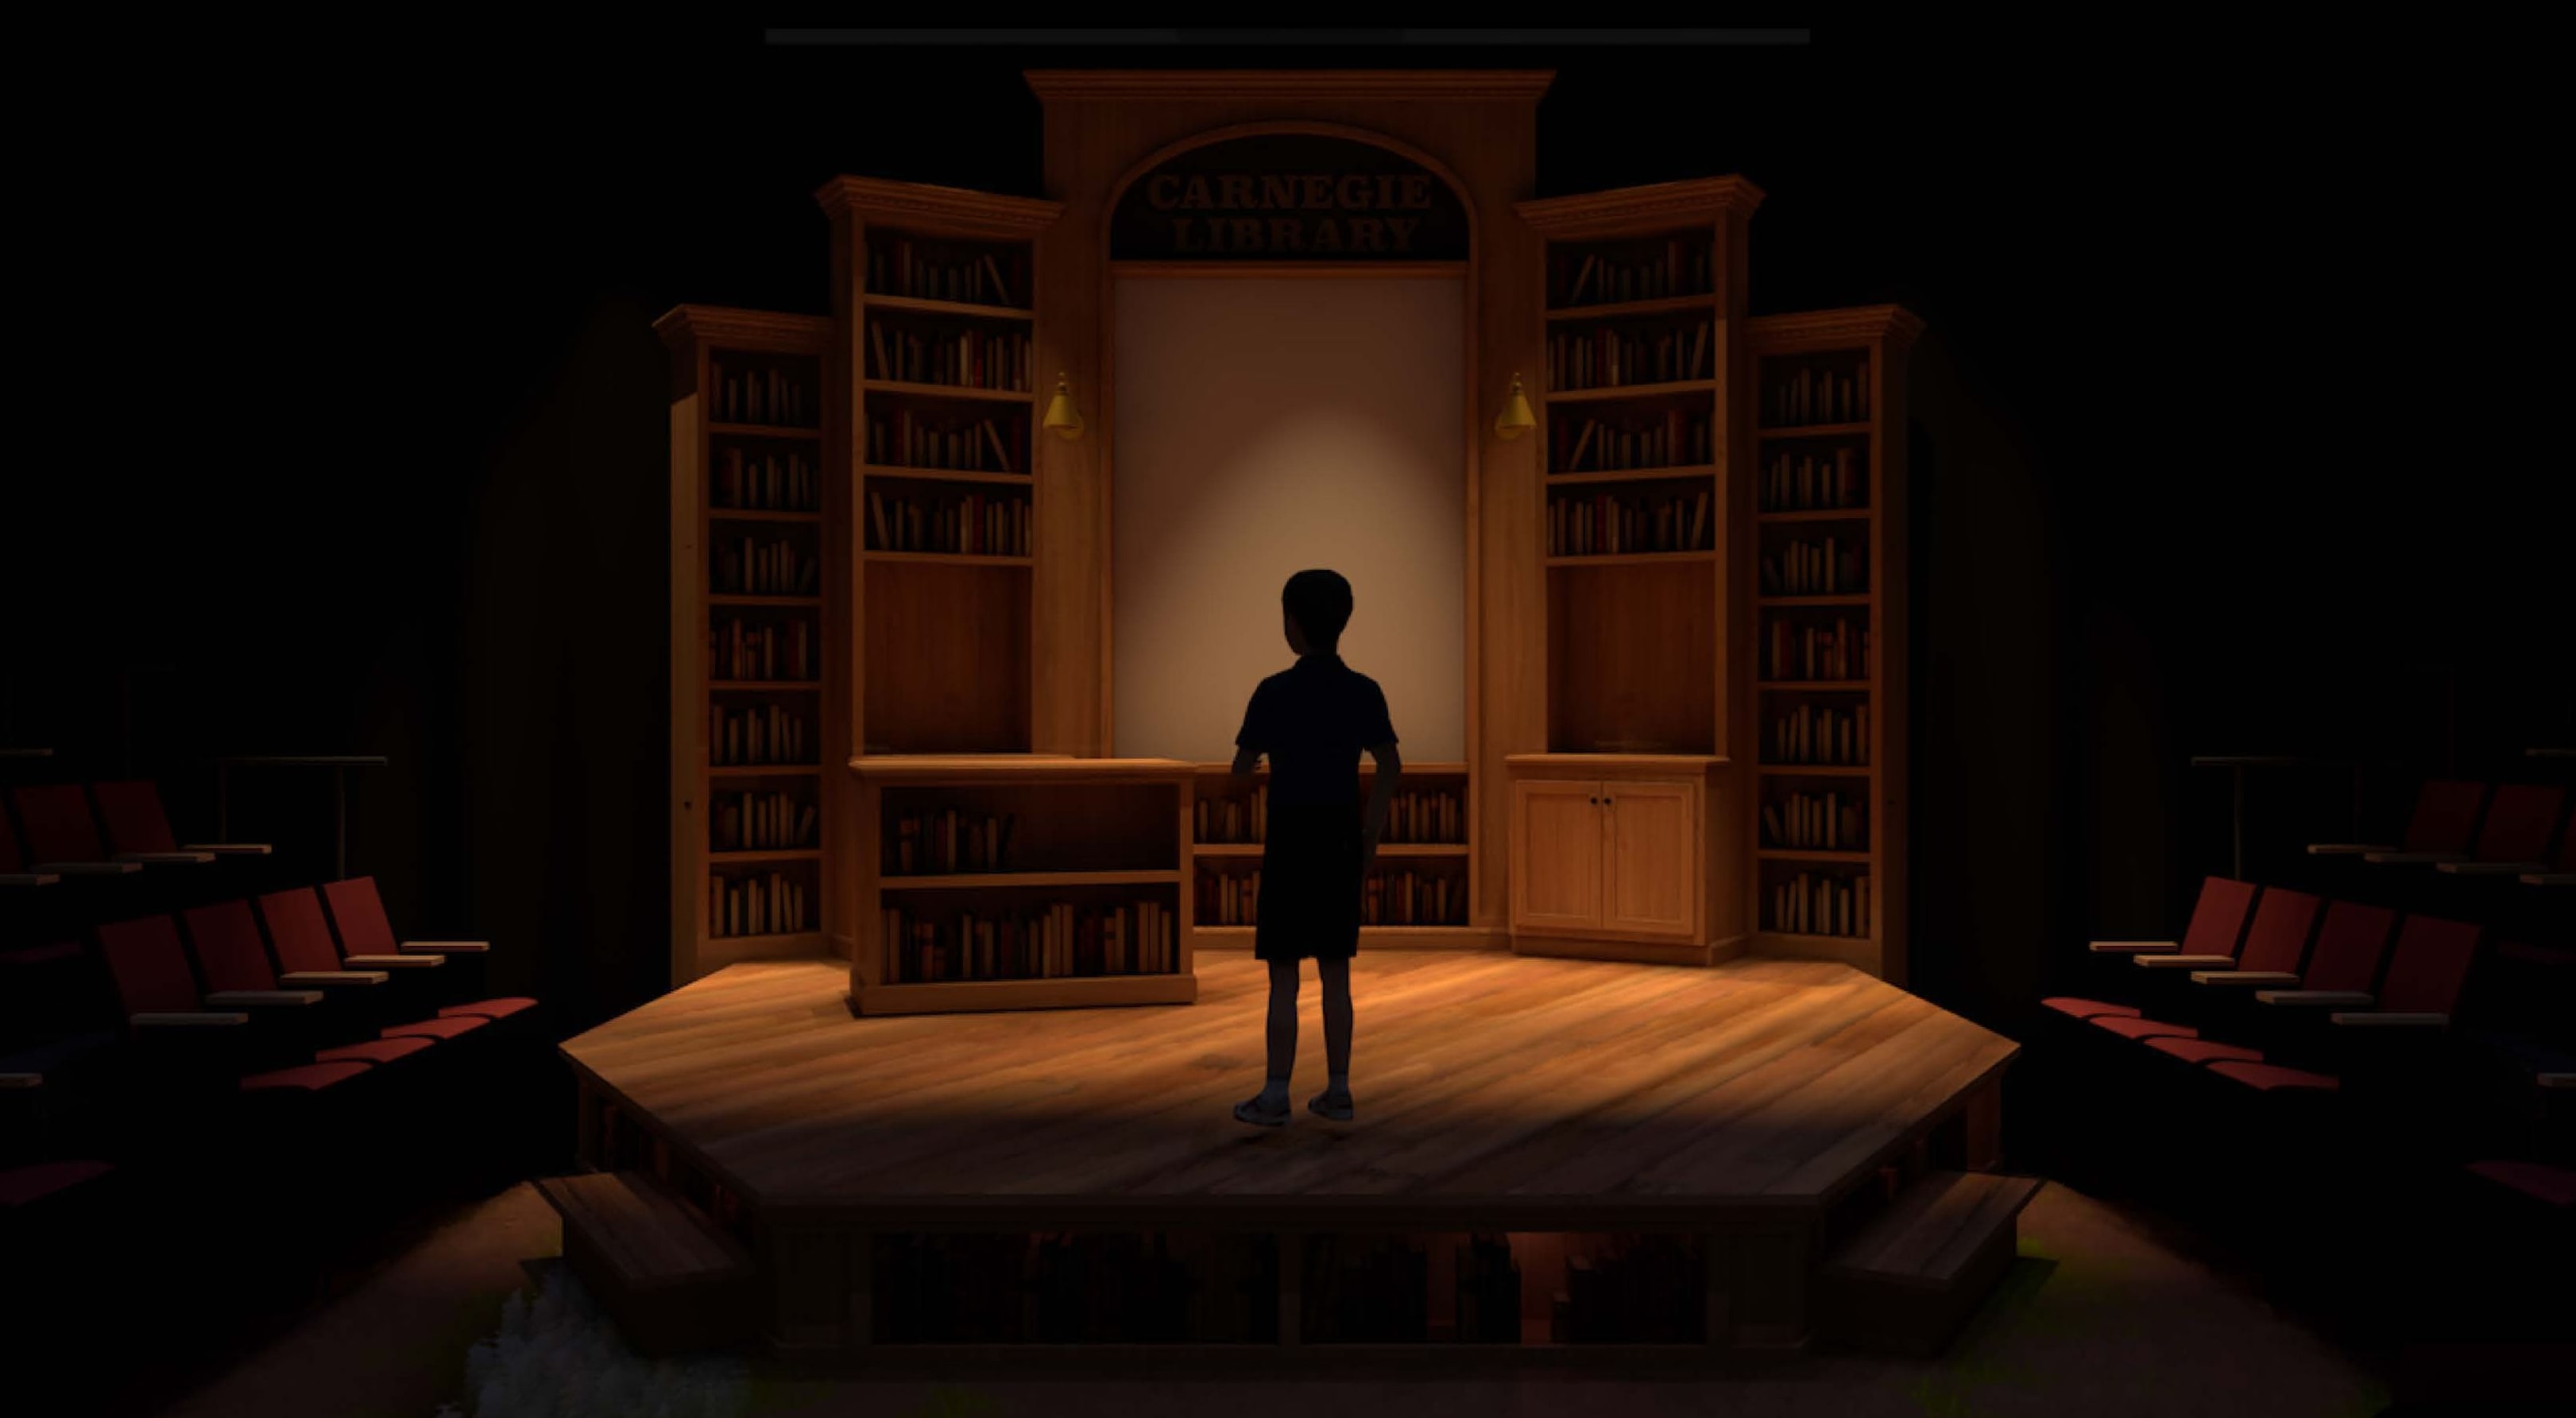
Shaded render
Use Shaded view to check composition, camera height, and model form before spending time on texture or light calculation.
Build the lighting layer before polishing the style
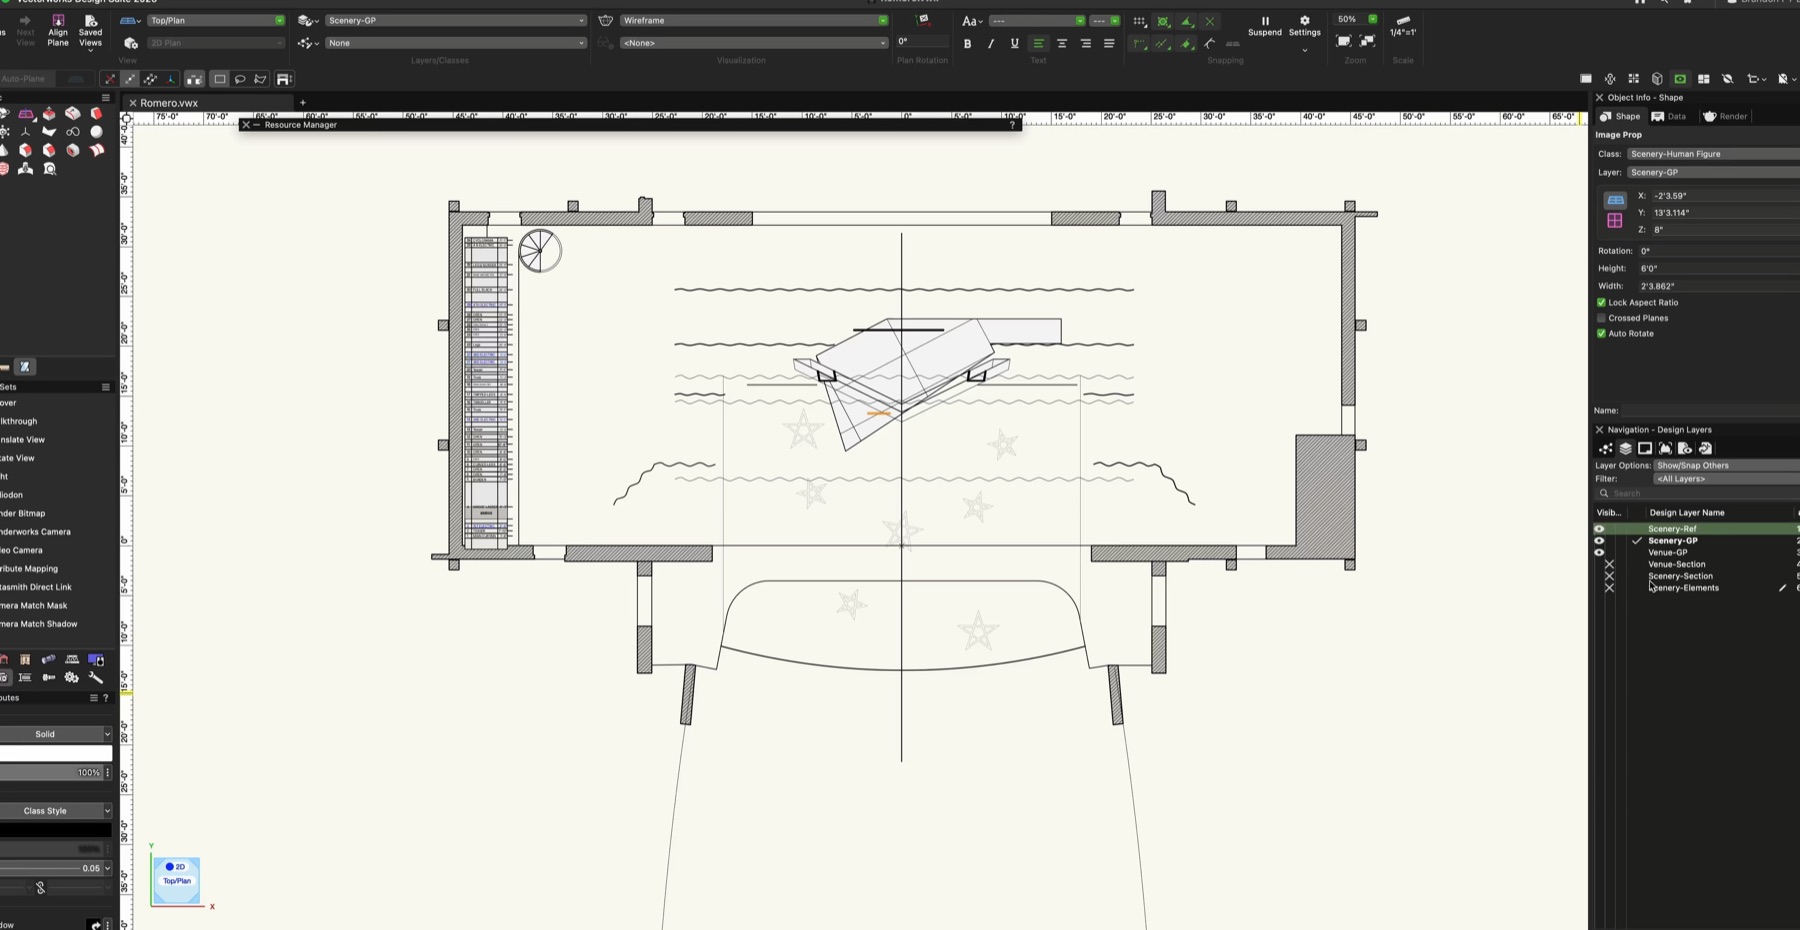
The workflow starts with a generic lighting layer, not a finished theatrical cue. A practical first pass is a grid of spotlights spaced roughly 4 feet apart, placed at a height that makes sense for the imagined venue, with the look height around 4 feet so light moves through the scenic volume.
After the grid exists, the useful move is subtraction. Remove lights that flatten the focal point, add front light only where the camera needs it, and name the lights clearly. The lighting layer should make the model easier to read before the Renderworks style asks for more render time.
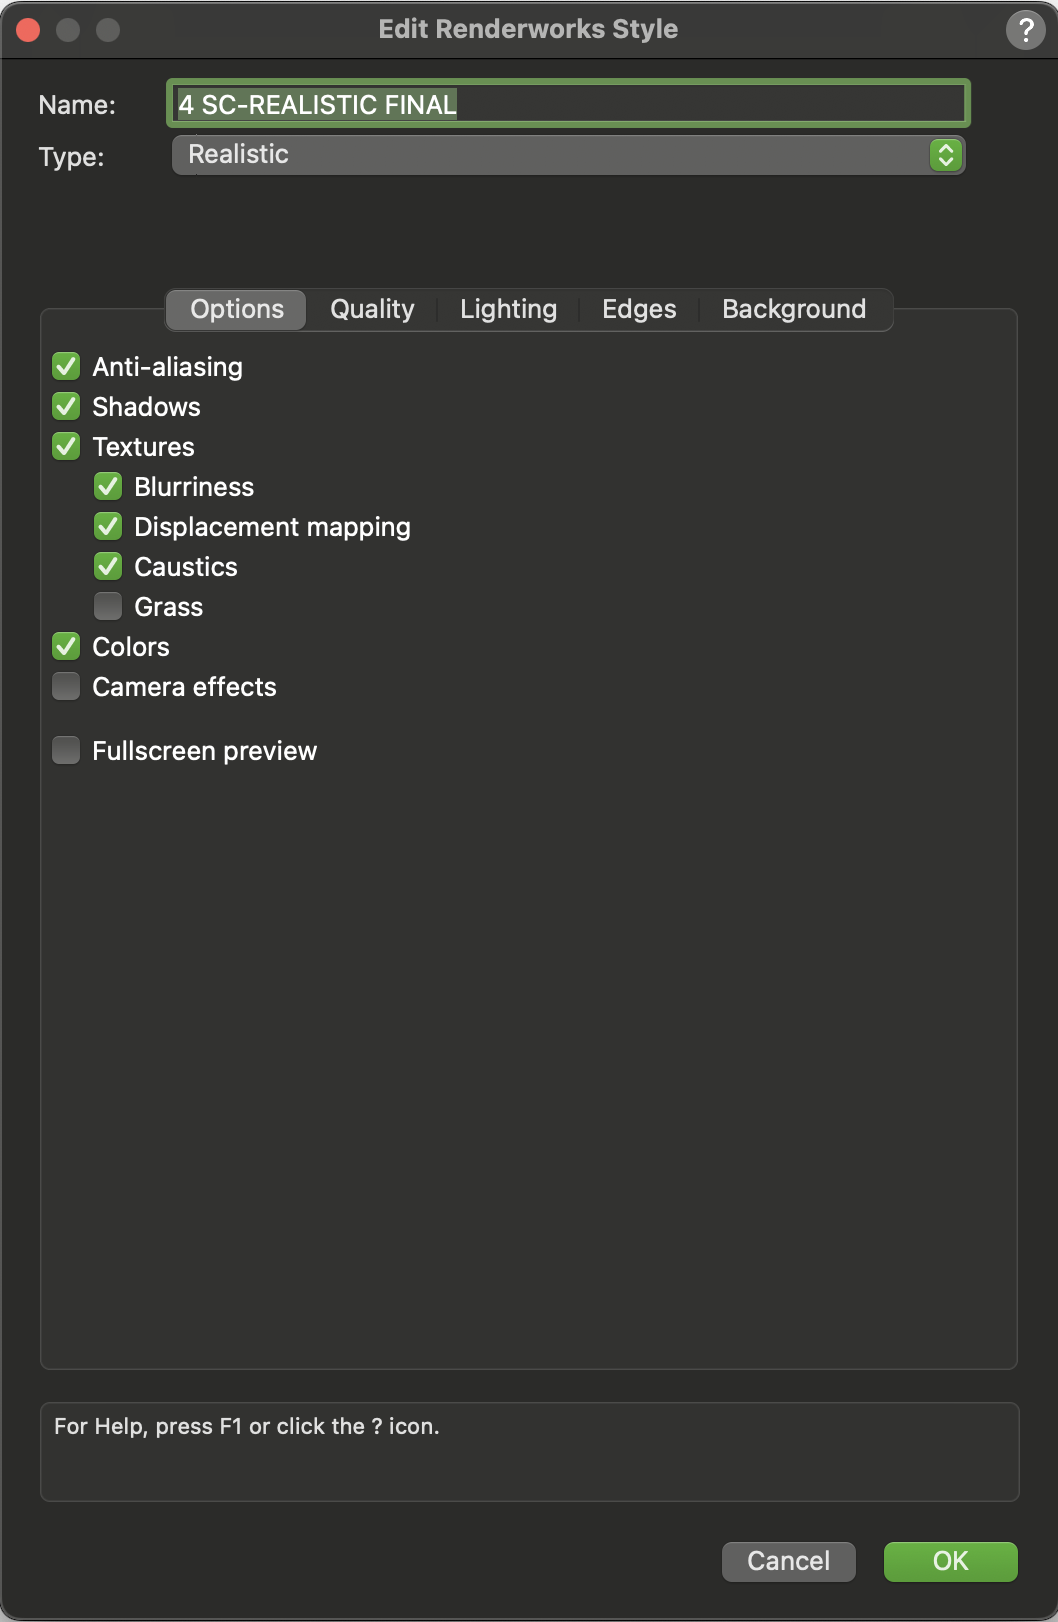
Build a custom render setting for scenic design
Once the lighting layer is doing useful work, the next step is not to pick a preset and hope. A custom Renderworks style lets the scenic designer decide how the image should calculate atmosphere, materials, shadows, indirect light, and render quality.
The process below follows the actual setup sequence: create the background, choose whether the style should use Redshift by Maxon or Realistic Renderworks, tune only the quality settings that change the read, then attach the background so the style can be reused across viewports.
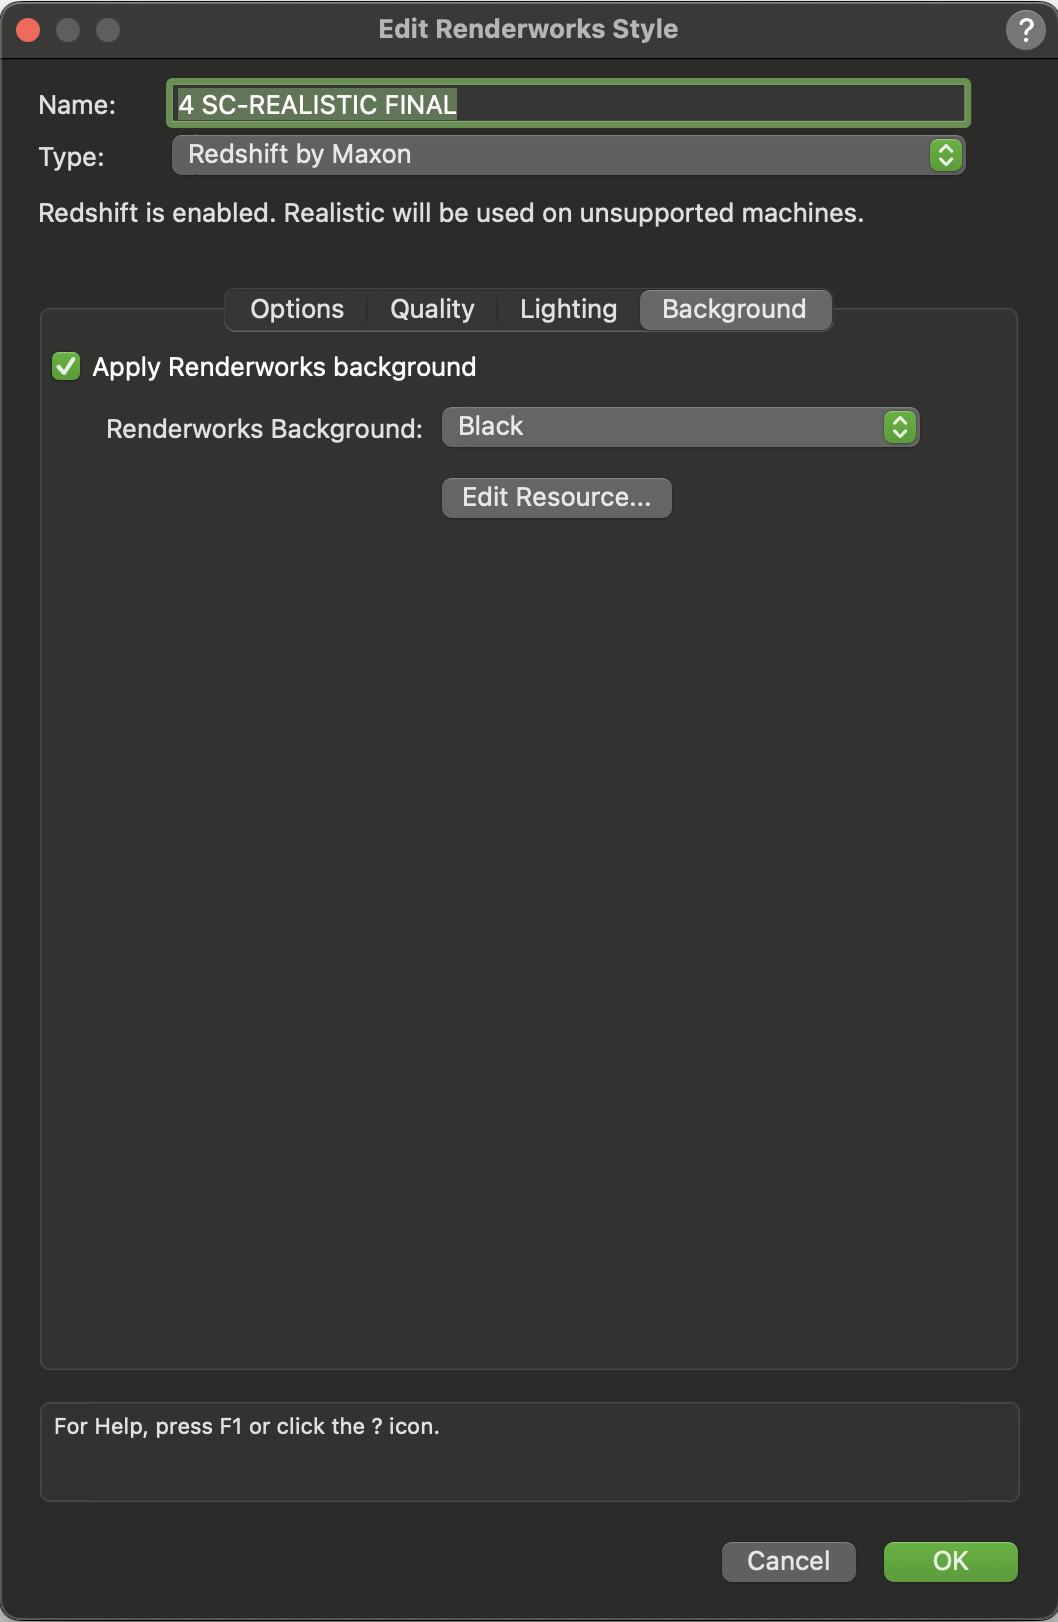
Step 01
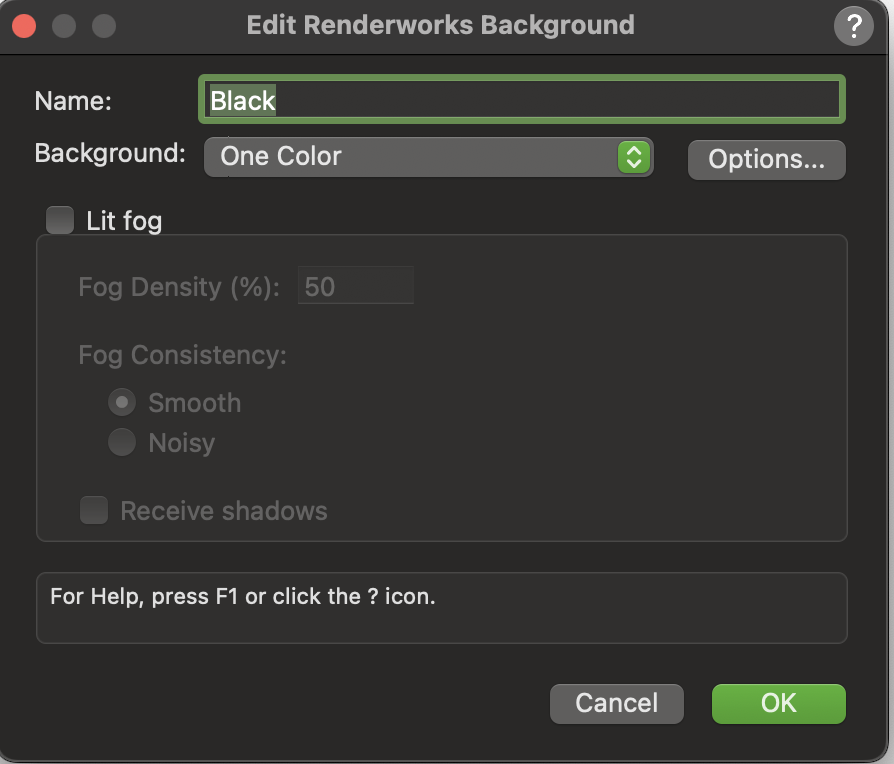
Start with the Renderworks background
A Renderworks Background gives the style its environment. In this workflow, the black one-color background creates a clean theatre-like field so the set, material values, and lighting contrast can carry the image.
If the rendering needs fog or atmosphere, that choice should also be made here. Lit fog changes how light moves through the scene, so it belongs in the render setup rather than being treated like a cosmetic overlay.
Step 02
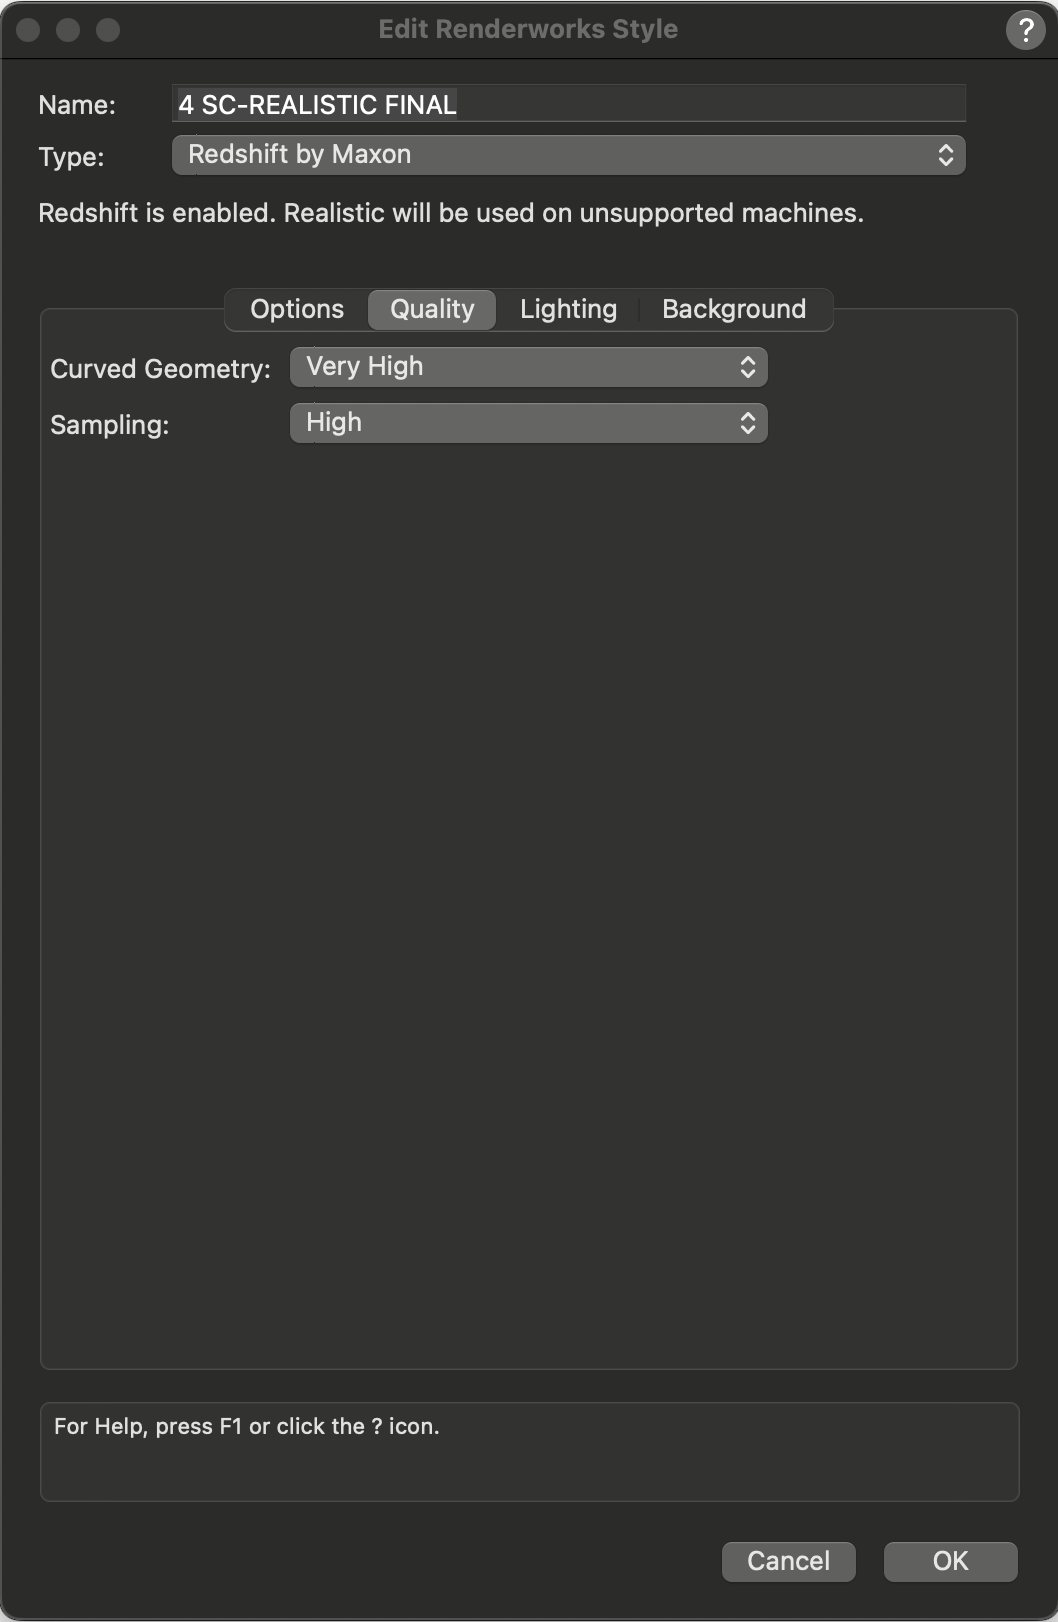
Choose the engine: Redshift or Realistic Renderworks
This is the fork in the custom style. Redshift by Maxon and Realistic Renderworks are both valid options; the right choice depends on whether the image needs deeper lighting calculation or faster material communication.
Lighting vs Texture
Shaded helps judge the lighting; Realistic helps judge the texture
Drag the divider across the same model. Shaded is the faster read for light placement, value, and focus because it stays simple. Realistic Renderworks is the better read for texture, surface response, displacement, and material finish.

Option 1
Redshift by Maxon
Choose Redshift when the scenic model needs richer light behavior, glow textures, blur, reflections, and a more complex sense of depth.
It is strongest for final presentation renders when the file is organized and the computer can afford the extra calculation. The benefit is not automatic beauty; it is more room for the engine to resolve light and material interaction.
Option 2
Realistic Renderworks
Choose Realistic Renderworks when the rendering needs a clear read of shadows, texture maps, displacement, color, and camera effects without turning every test image into a long render.
It is often better for iteration, teaching, and quick design review because it communicates scenic materials quickly and consistently.
Step 03
Tune quality for the engine you chose
The quality pages are not a separate design idea. They are how the selected engine is tuned so the image spends render time where the camera can actually see the improvement.
Option 1
Redshift quality
Very High curved geometry can help round scenic objects, railings, trim, and furniture read cleanly. Higher sampling can reduce noise in darker renders or scenes with more complex lighting.
Raise these settings because the camera can see the problem, not because the menu offers a higher value.

Option 2
Realistic quality
Clean curved geometry, stronger anti-aliasing, readable indirect light, and controlled soft shadows help the scenic model feel less mechanical.
Other settings can stay moderate. Low blurriness preserves texture information, medium displacement keeps surface relief visible, and limited reflections keep the render from spending time on effects that may not matter.
Step 04
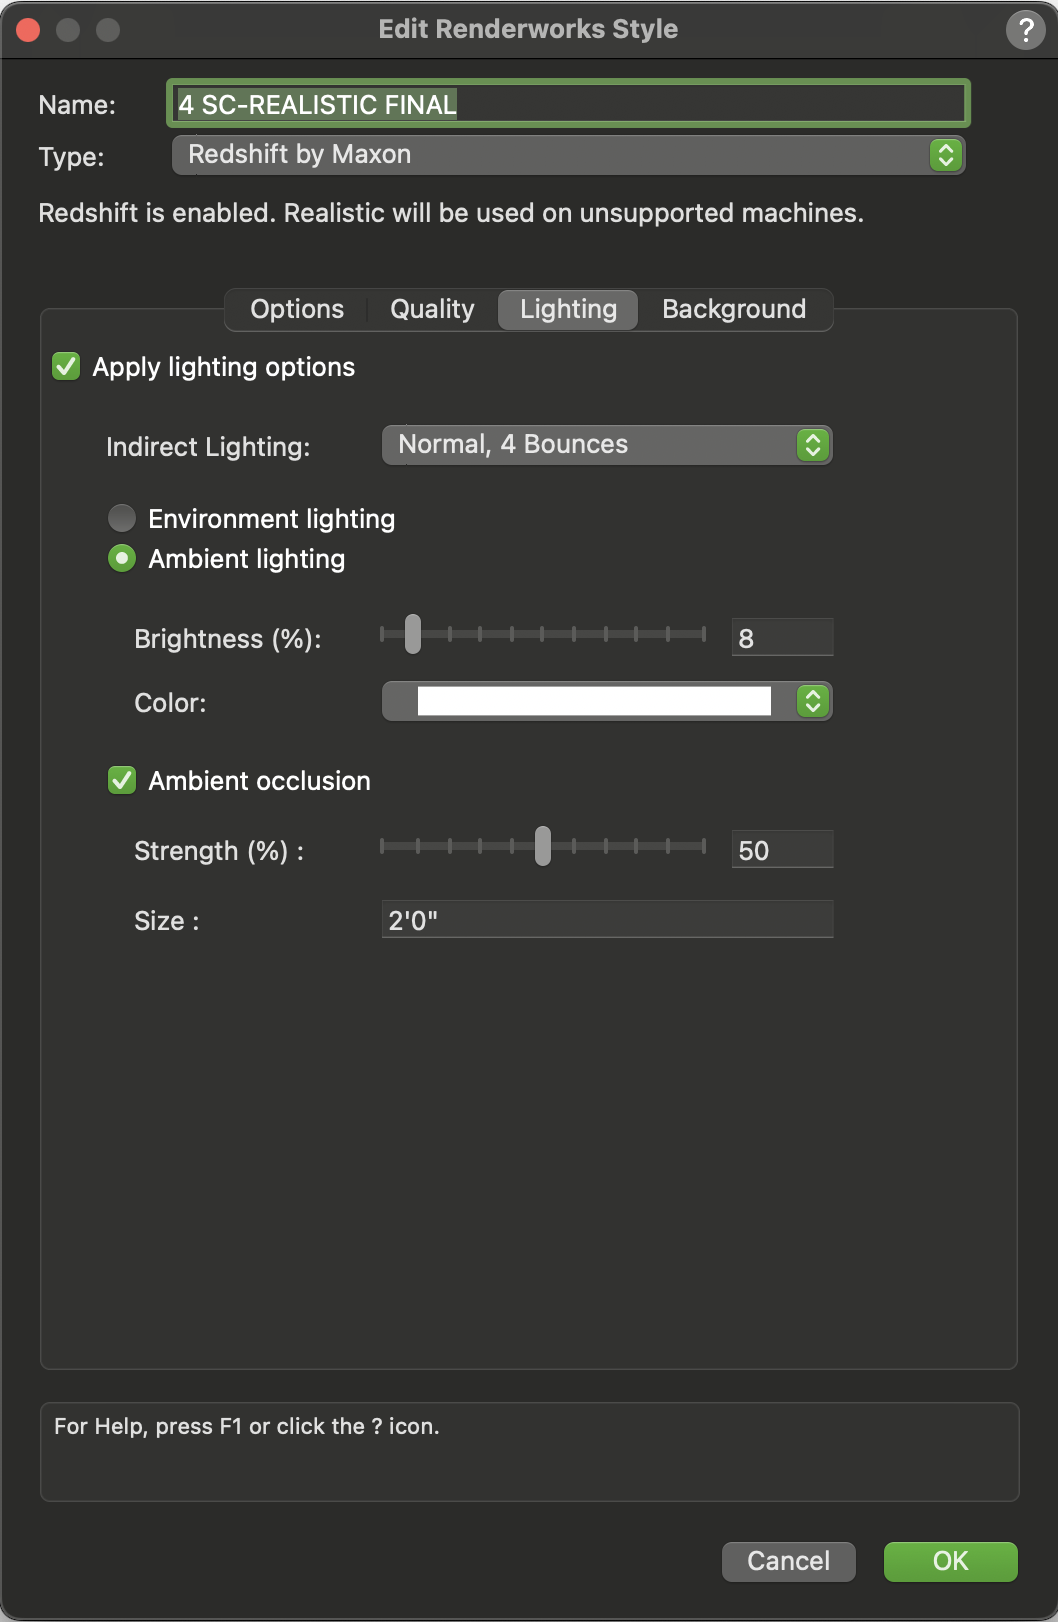
Let the style interpret the lighting layer
The Lighting tab determines how the render style reads the lighting layer. Normal indirect lighting with a few bounces lets light move through the scenic volume, while a small amount of ambient fill keeps dark areas readable without flattening the composition.
Ambient occlusion is especially useful in scenic renderings because it reinforces contact: where platforms meet the floor, where walls overlap, and where furniture sits inside the world of the set.
Step 05
Save the background into the finished style
The last move is to attach the background to the Renderworks style itself. That turns the setup into a reusable custom render setting rather than a loose set of viewport choices that has to be rebuilt later.
For scenic design, that repeatability matters. The same style can support multiple cameras, model revisions, and presentation images while keeping the visual language consistent.
A render style is useful when every setting has a job: reveal the form, support the materials, focus the eye, or save the file time.